5 iPhone Photography Tips

How often have you found yourself frantically snapping off photo after photo in hopes of getting one usable photo? Probably more often than you care to admit. The truth is that while our smartphone cameras continue to improve exponentially our ability to use them effectively has not maintained that pace.
Here are my Top 5 Tips for improving your smartphone photos.
These tips are universal, applicable to just about any type of photography but I have chosen language that primarily centers around photographing people. If you want to photograph landscapes or just about anything else, these tips will still serve you well.
TIP #1 - Know Your Camera Settings
Understanding all the settings, tools, and buttons on your smartphone camera is the best way to get the most out of your smartphone camera. This may not be the most exciting tip but having a firm grasp of your camera’s features will only benefit you in the long run and will make it easier to keep your focus on mastering the other tips on this list.
At the very least, you should know how to focus manually and change your exposure.
Manual Focus
To manually focus all you need to do is tap the screen where you want it to focus. Tap and hold to lock focus.
Manual Explosure
To manually change exposure on the iPhone simply place and hold your finger on the screen then slide up to raise the exposure or down to lower it.
Tip #2 - Find Your Light
Now that you have a better understanding of how your iPhone camera works you can begin to focus on getting the best photos you can. This is the most important photography tip you might ever get. Lighting is the foundation of just about any great photo, more so than the quality of your camera or lens. How you place your subject into the light is, of course, up to personal taste and will be determined by several factors but getting your lighting right will undoubtedly help the quality of your photo. Knowing the difference between hard light and soft light, and having a basic understanding of how light works is hugely important to becoming a better photographer.
Hard Light vs Soft Light
Hard light has well-defined shadows and tends to be more intense. Soft light has more subtle shadows and is more, well soft.
Outdoors
If you’re photographing in midday hard sunlight you will likely want to find open shade if possible. Under a tree is often the first place someone looks when photographing outside and it can be beautiful but you will be surprised at how well you can find shade once you start looking.

Under a Tree
You can see here that the sun is still high in the sky creating some harsh lighting, however by placing the subject under the tree in shade the light is much softer.
Avoid having your light source directly behind your subject in most cases, as this will put them in shadow. This can be completely ignored in two specific circumstances, if your goal is to create a silhouette or if the sun is low in the sky (sunrise or sunset).

Silhouette
This is a great example of the light directly behind your subject creating a silhouette. When attempting to get this shot make sure to expose for the background and not your subject. And you know how to do this thanks to tip #1.
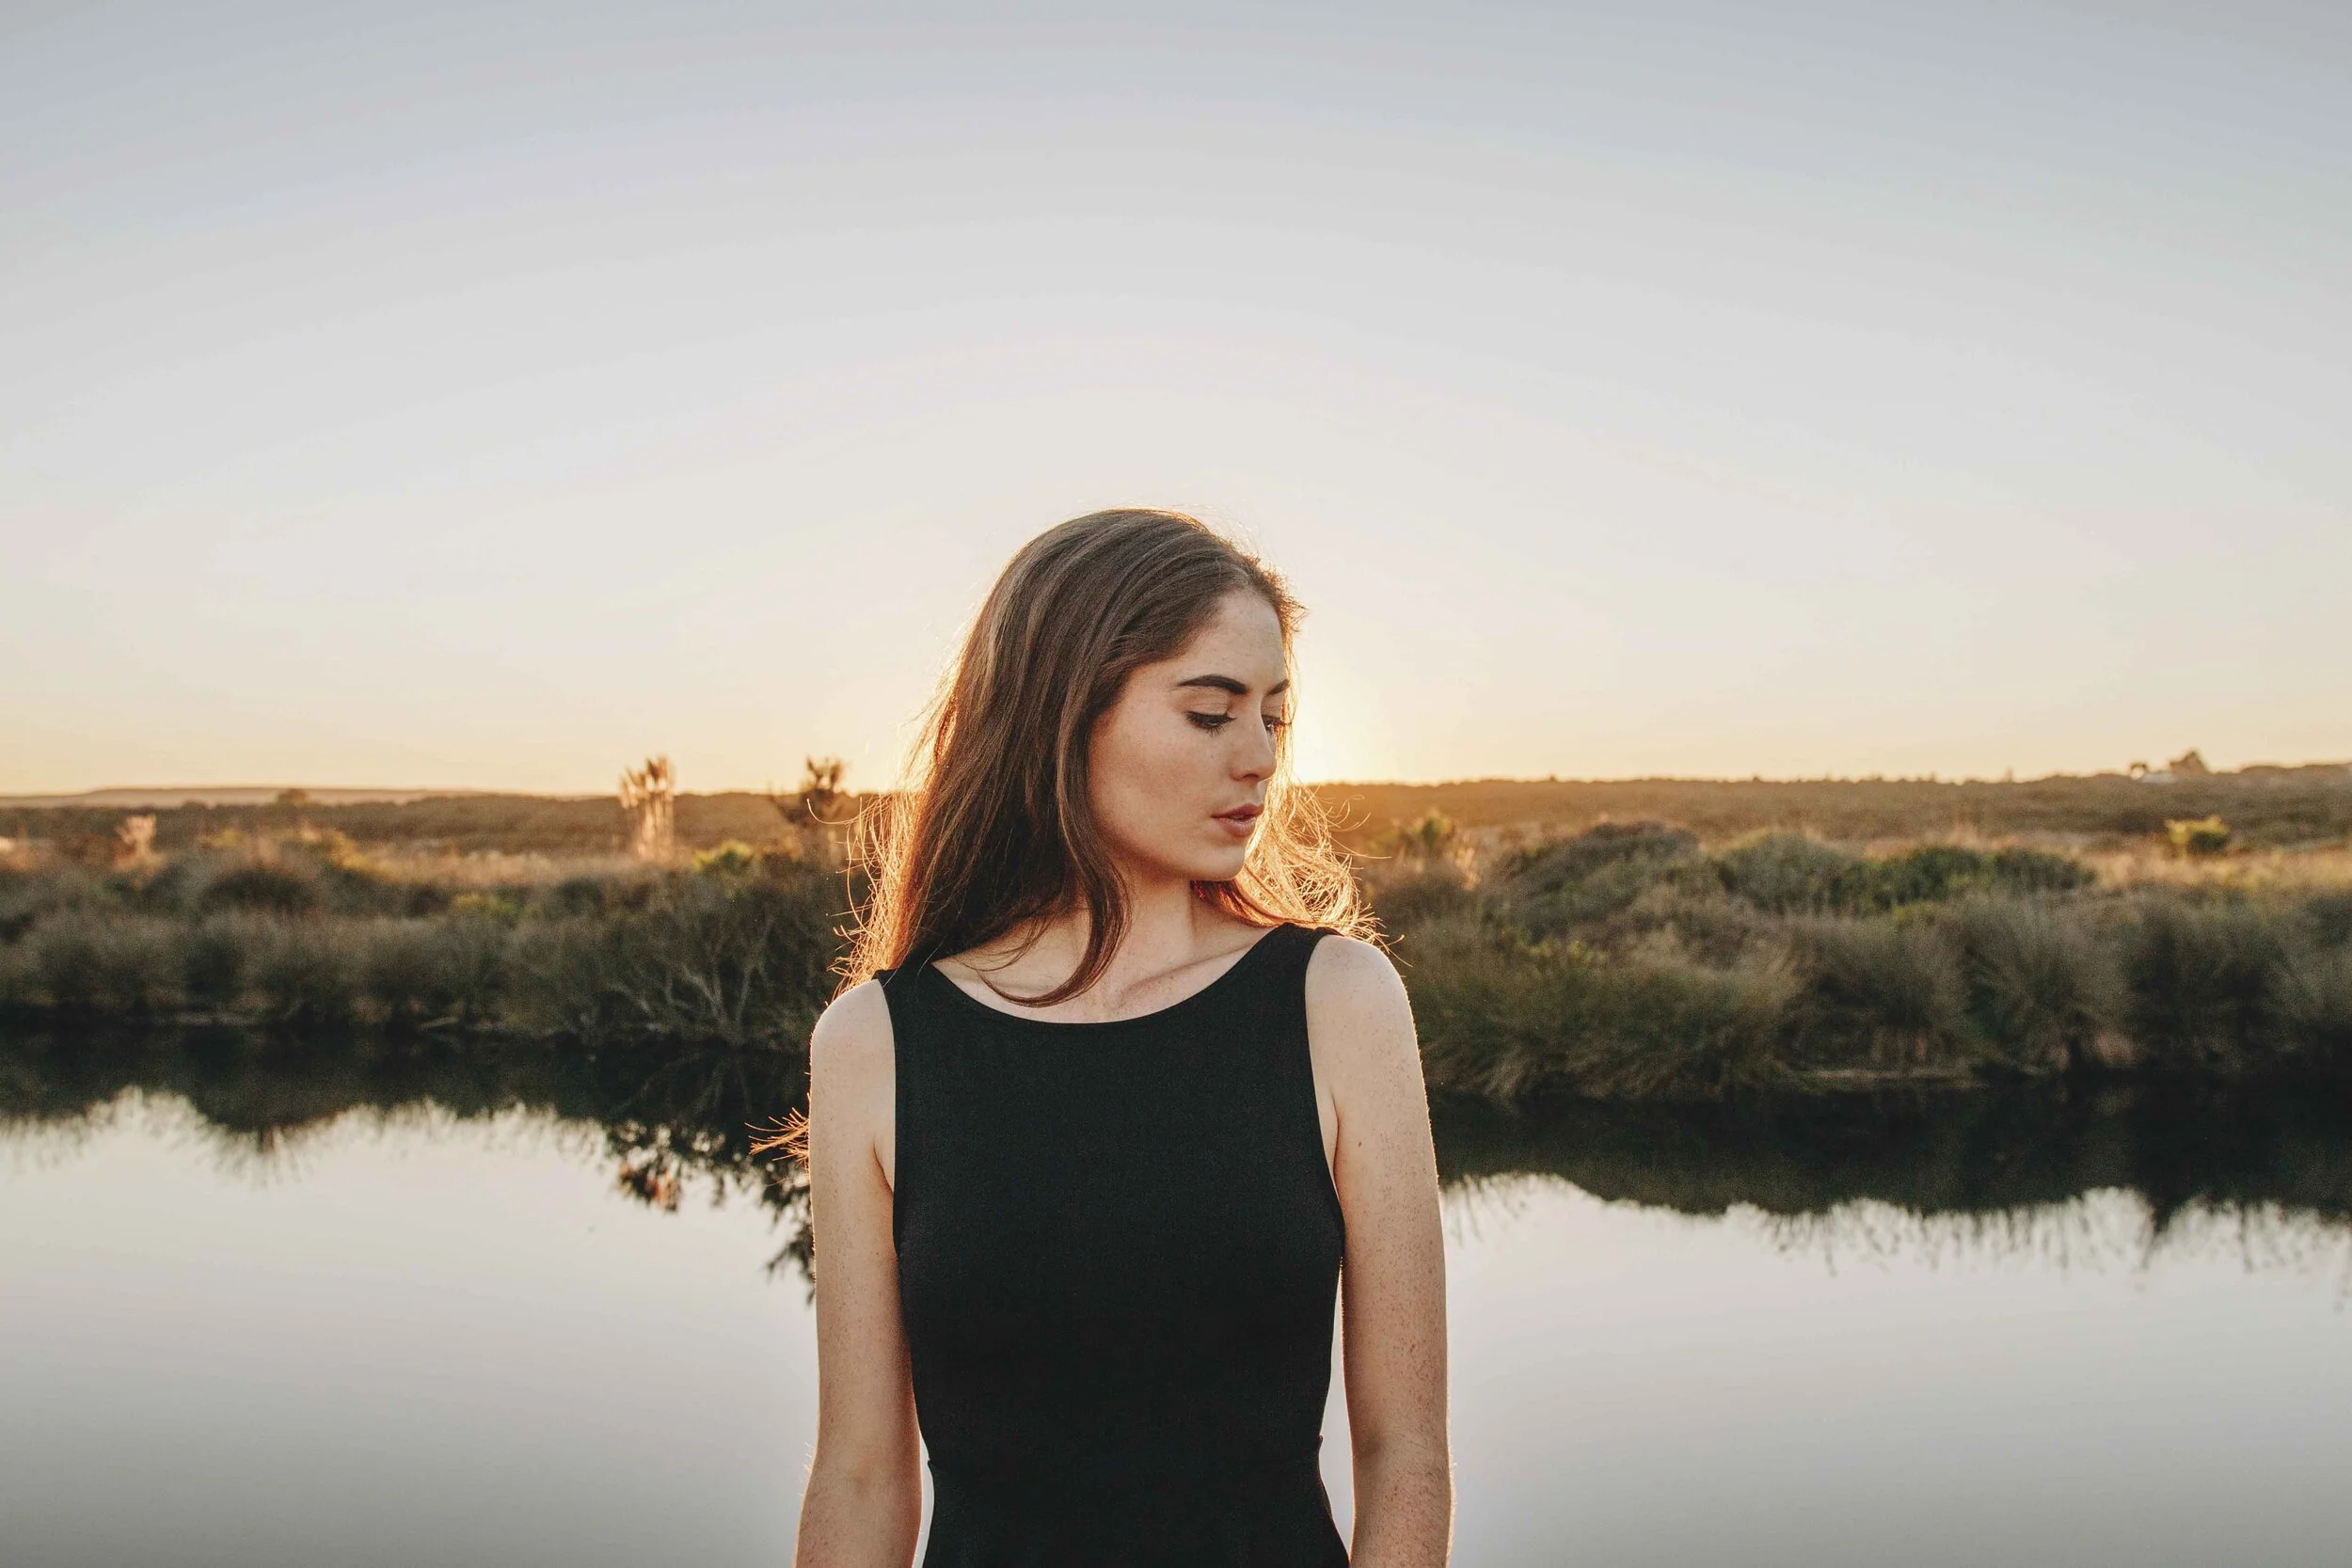
Sunset
This shot is similar to the silhouette photo with the sun directly behind the subject, but this shot was taken later in the evening with the sun lower in the sky creating softer light. For this shot you want to expose for the subject. This time of day is known as golden hour and is typically the most desired time of day to photograph outdoors

Overcast
Photographing on an overcast day like the photo here allows for softer light even during the middle of the day. In this photo the subject is facing towards the sun but the cloud cover is preventing too much light from falling on them.

Direct Sunlight
This is a great example of hard light. The subject is facing directly towards the midday sun, leaving deep shadows in the eyes. If you must photograph under these conditions simply have your subject turn so the light is coming across the side of their face instead of directly at them.
Indoors
When photographing inside it’s a good idea to place your subject near a window and depending on the size of your window you may not even need to get that close to it. The direction your subject faces largely depends on how bright the light is that’s coming in through your window.
Play around with this by photographing someone near a window, start by having them face the window directly, then photograph a few angles as they rotate away from the window.

Direct Window Light
In this photo the subject is facing directly at the window, it’s nice lighting and creates beautiful catch lights in the eyes

Distant Window Light
Another example of a subject facing mostly towards a window. Here the subject is turned only slightly.

Bad Window Lighting
If the light coming in through your window isn’t lighting up the entire space or is too bright and your subject faces away from the window you will end up with a photo of a shadow, as seen here. Underexposed subject, not ideal.

Side Window Light
Notice the soft shadow on the subject’s left side. This beautiful lighting is known as Rembrandt lighting.

Window Silhouette
As with outdoor lighting, if you’re going for a silhouette getting the light behind your subject is the way to do this. Here the light is coming through the window on the other side of the subject. To achieve this expose for the background.

Bad Side Window Light
The subject is turned away from the window leaving her face in deep shadow. Mysterious but probably not what most of us are going for.

Better Window Light
Here she is now looking up towards the window which lights her entire face.

Typical Indoor Lighting
An example of a typical indoor photo, this was shot without window light by simply using the standard overhead lighting. Notice the overhead lighting creates unflattering shadows under the eyes.
Tip #3 - Photograph At Eye Level
Try a quick test, take two photos of your kid, your dog, or your coffee cup, anything. The first photo stand and photograph your subject from above, the second photo get down and take the photo at eye level with your subject. Now review your photos. You may like each but the photo taken at eye level will most likely be the better of the two. Most anything will look more interesting when viewed at eye level. Peruse your favorite online retailer and you’ll quickly notice that most items are photographed at eye level. Photographing your subject from this perspective will not only make your photograph more interesting it will also connect you to your subject more emotionally.

From Above
This photo is a typical snapshot of a child. Even though it’s a cute photo there’s an emotional disconnect

Eye Level
The focus is on your subject and makes more of an impact.
You can actually see this technique used in every good photo in this article. The kids on the beach, the woman drinking coffee, the woman on the bed, the kid playing piano, the baby near the window. They’re all at or very near eye level.
Tip #4 - Compose Your Photo
Nothing says snapshot like an uneven horizon or a poorly cropped photo. Take the time to compose your photo and you’ll take fewer shots as well.
Level Horizon
Make sure your photo is level. It’s the easiest stuff that tends to get overlooked and there’s nothing easier than this!

Tilted Horizon
Cool image but something is just off about it. A tilted horizon might now always be noticeable but it can throw off an image

Even Horizon
Not all of your photos will be a literal horizon but it’s an easy way to demonstrate the concept.
Watch Your Headroom
Many photos taken by amateur photographers have too much space, especially too much headroom (the space between the top of a subject’s head and the top of the photo. If you see that you have too much headroom you can easily crop it afterward but it’s a good idea when using your phone’s camera to get the photo right in camera.

Too Much Room
Since the background is too bright to see much detail this image would be better with less space around them.

Zoom in or Get Closer
Less space means the focus is on your subject and you see their expressions better.
Rule of Thirds
This is a simple composition technique to help put some order to your photos. Divide your photo into a 3x3 grid, most smartphone cameras will have the option to enable the grid right in the viewfinder and I suggest utilizing it.

Enable the Grid

The Grid
The idea is to place your subject along one of these lines and preferably at an intersection of two of the lines. Simple!

Rule of 3rds - People
The kids are sitting almost exactly at an intersection on the grid. It also makes more sense to leave space in your photo the direction your subject is looking.

Rule of 3rds - Landscape
Here the rowboat isn’t exactly on an intersection but that it’s on a line is sufficient and it is very near an intesection making it even more effective.
Review the other photos from this article and you will see the majority follow the rule of 3rds quite well.
Leading Lines
Lead eyes to your subject by using leading lines. These lines can be just about anything; paths, buildings, streets, windows, and even people. To do this you photograph from a perspective that utilizes a “line(s)” from the environment that leads to your subject. Preferably the line will start from a corner.

Leading Lines
This is just about as perfect an example as there can be, don’t expect your photos to have bridge railing leading perfectly from all four corners directly to your subject.
Center
Simply place your subject at the center of your frame for this composition technique. This is a great option when photographing people, especially if they are sitting or standing with no movement. It’s also good when photographing the most well-balanced scenes. If the photo has equal interest when split in half this may be the best choice.

Centered Without A Person
Decently balanced even though the shade is greater on one side.

Centered With A Person
Not only is the background balanced between left and right but the subject is posed so that she is balanced left to right as well. This pose would usually look awkward but works well here.
Tip #5 - Watch The Background
Having a clean background helps keep the focus on your subject. Avoid having distracting objects behind your subject, especially ones protruding from the back of your subject’s head. Typical culprits are street signs, light poles, and trees.

Tree Background
Here you see a tree protruding from the subjects’ heads.
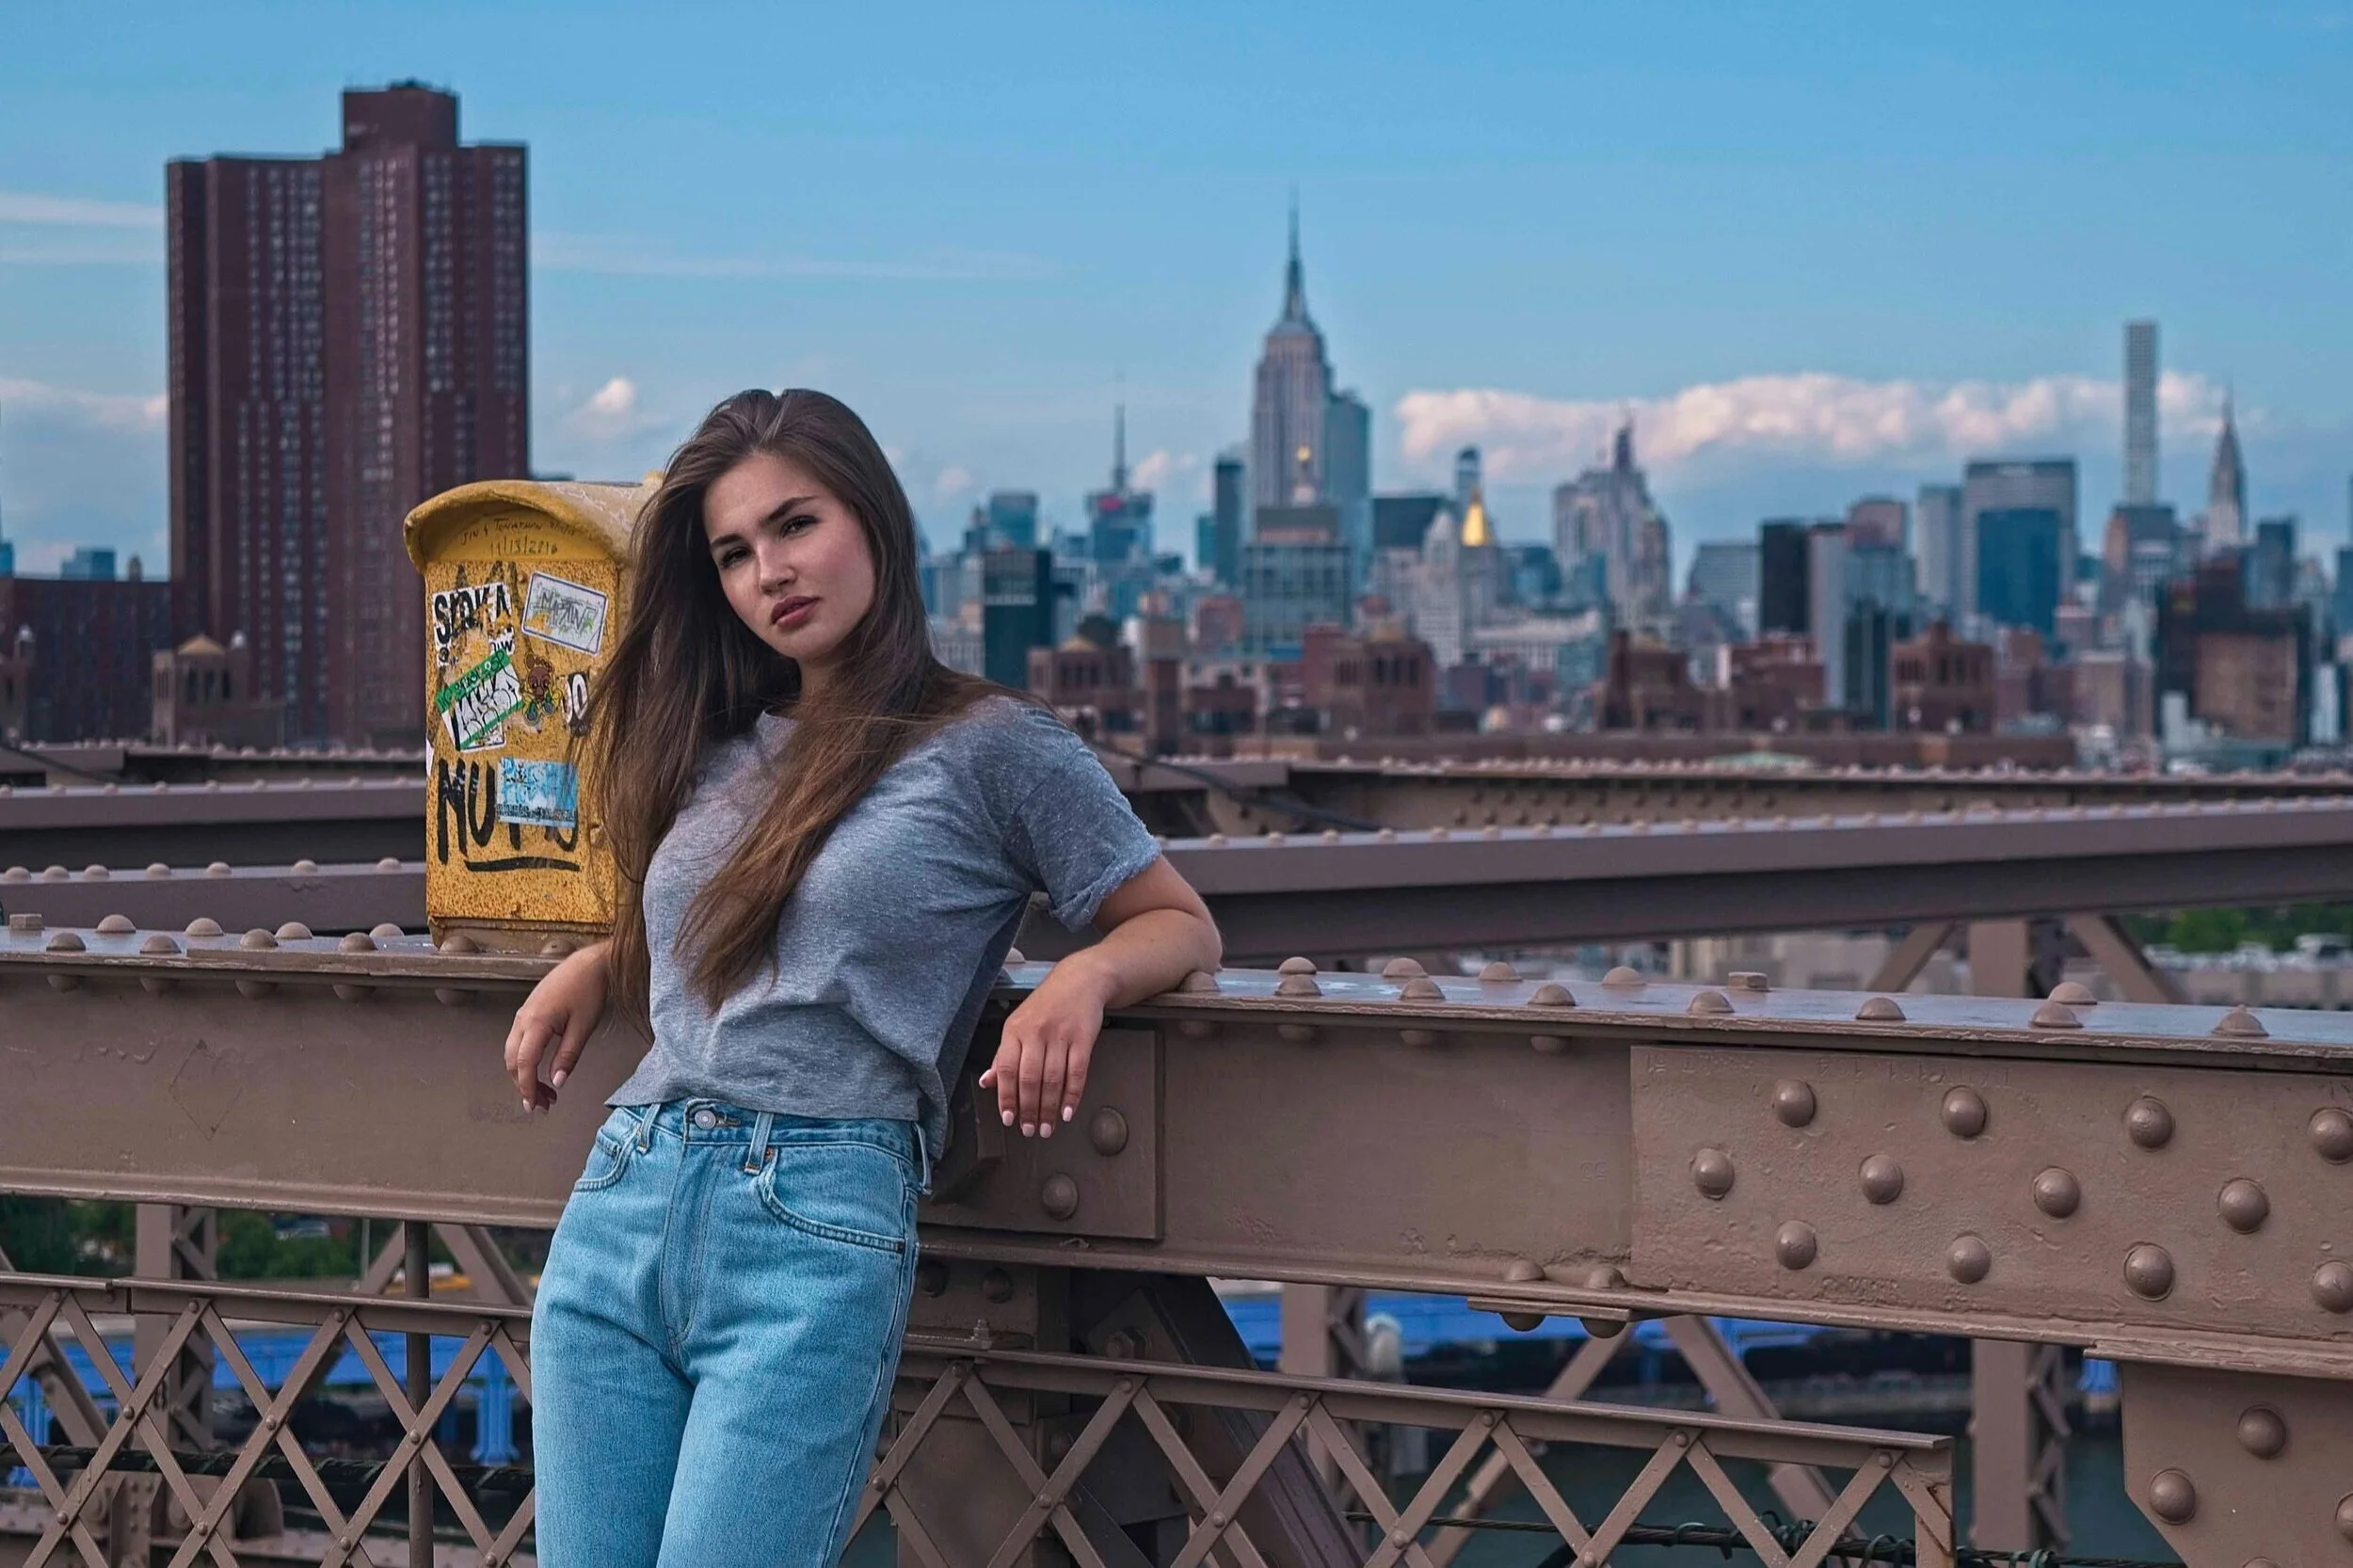
City Background
Avoid having your subject stand in front of or directly next to something so distracting. Not only is it protruding from the back of the subject it’s also the only pop of color in the shot. Not desirable.
Final Thoughts
A few closing thoughts. You shouldn’t expect to master these overnight but if you keep a mental checklist when taking your photos you will absolutely begin to see an improvement before long. And lastly, please keep in mind that these are tips and not rules set in stone, they are simply suggestions that when followed will likely get you better photos.
-photo credit stock photos-